Sunday, 20 October 2013

Styrofoam Carving

Definition of Centerpiece
- something in a central position, especially a decorative object or arrangement placed at the center of table.

Type of centerpiece

wood carving
flower management/ decoration
butter sculpture
styrofoam carving (thermocol carving)
ice carvng
fruits carving

History of Styrofoam Carving
    Stryofoam is a tademarked brand of closed-cell,extruded polystryrene foam currently made for thermal insulation and carft applications.It is owned and manufactured by the Dow chemical company.
     In the United states and canada,the word styrofoam refers to expended polystyrene foam,such as disposable coffee cups,coolers or cushioning materiall in packaging,which are typically white and are made of expended polystyrene beads.This is a different  material from theextruded polystyrene used for styrofoam insulation.The polystyrene foam used for craft applications,which can be identified by its roughness and by the fact  that it 'cruches' when cut,is moderately soluble in many organic solvents,cyanocrylate and the propeliants and solvents of spray paints,and is not specifically identified as expended or extruded.Another trademark for expended polystyrene is thermacol.
     In 1941,researchers in Dow's chemical Phycic Lab found way to make foamed polystyrene.Led by Ray Mclytire,they rediscovered a method first discovered by Swedish.       Foam is made by mixing a number of chemicals and adding a "gassing agent" that makes bubbles that make the plastic cellular. Foamed plastics are heated from within- the heat comes from the chemical reaction. When the block of foam has finished rising, it's called a bun of foam. Theoretically, there are as many different kinds of foam as there are different kinds of plastics. But practically speaking, there are only three families of foamed plastic used for sculpting.

Tips in styrofoam carving
- cutting
- sanding
- sculpting
- texturing
- cookie cutters
- curling
- painting
- gluing


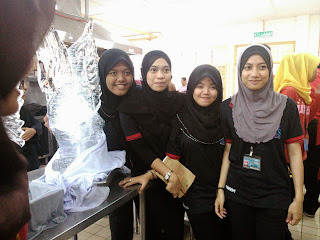
ICE CARVING

History

The history of ice carving begins with the harvesting ice. The earliest known record of an ice harvest is found in the Shih cheng or “Book of Songs” written at about 600 B.C. This collection of stories describes the everyday life of the Shensi warrior-farmers as they lived in the highlands of northwest China, and mentions their winter routine of flooding their fields with water. When the water had frozen, the ice was cut into blocks and stored in icehouses. The ice was used in the warmer months to keep their fish fresh also used for centerpiece.  In the 1600s, native hunters and fishermen of the Chinese province of Heilongjiang, on the border of Russia, designed ice lanterns for dark winter nights. They filled buckets with water to make ice, then slid it out, and put a candle in the hole to make a lantern. The trend spread, and people started hanging decorated lanterns from homes and parading them in carnivals. In 1897, the Transsiberian Railway was extended through the small Chinese fishing town of Harbin in Heilongjiang, once occupied by Russia. As a result of the traffic, Harbin grew into a cosmopolitan city. With below freezing winds from Siberia, and ice from the frozen Songhua river, Harbin became the home of the annual International Ice and Snow Sculpture Festival. Currently, this festival features the work of thousands of artists from all over the world.  The first well-documented ice palace was built as the setting for a monstrous joke. On the frozen River Neva, in the winter of 1740, a shivering bride and groom spent their wedding night in a building of ice. The palace was commissioned by the Empress Anna Ivanovna, who like Peter the Great, had a malicious sense of humor. In St.Petersburg, to distract the people from the bitter cold, Empress Anna had an ice palace built as the stage for a wedding. Anna forced Prince Mikhail Golitsyn to marry her exceptionally ugly servant. After the church ceremony, the bride and groom, covered in furs, seated in an iron cage fastened to the back of an elephant, headed an elaborate procession including horses, camels, wolves, & pigs. Guards posted outside made sure that they spent the whole night in the frozen mansion.  Harvesting natural ice increased throughout the world until the mid 1800’s when Ice manufacturing began. In 1834, Jacob Perkins, obtained a British patent for the first ice making machine using ether. In 1859 Ferdinand Carre invented an ice machine that used ammonia, a much more volatile liquid. Cans of water were lowered into a 15 degree brine (Calcium Chloride) solution chilled by an ammonia system. Air was bubbled into the center of the can to make clear ice for carving. By 1920, 750,000 blocks of ice were made every day in the United States alone!  In 1892, Nellie Melba was performing in Wagner’s opera Lohengrin at Covent Garden. The Duke of OrlĂ©ans gave a dinner party to celebrate her triumph. For the occasion, Escoffier created a new dessert, and to display it, he used an ice sculpture of a swan (swans were featured in that opera). The swan carried peaches which rested on a bed of vanilla ice cream and which were topped with spun sugar. The Sapporo Snow Festival which began in 1950 is one of Japan's largest winter events. Every winter, about two million people come to Sapporo to see the hundreds of beautiful snow and ice sculptures. For seven days in February, these statues and sculptures turn Sapporo into a winter dreamland of crystal-like ice and white snow. 1955, the Self-Defense Force joined in and built the very first massive snow sculpture, for which the Snow Festival has become famous for now.  In 1964 Virgil Clinebell invented a machine that produced 15 lb blocks of clear ice. This lead to the CB300 which makes crystal clear 300 lb blocks of ice. Modern carvers use crystal clear ice to make ice carvings. In recent times Ice carving has become more specialized. Because of this specialization more and more professional chefs are leaving ice art to the modern ice carving company.  Since 1989, Fairbanks Alaska has hosted the annual World Ice Art Championships. Over 100 sculptors come from around the world each year to sculpt large blocks of pristine natural ice. The competition is broken down into two main categories: Single Block and Multi-Block and each competition is further separated into Abstract and Realistic sculptures. In the late 1980’s there was a tool revolution lead by Mark Daukas. By winning numerous competitions he brought attention to the die grinder & angle grinder. Steve Brice has invented numerous tools including many ice carving bits & the nailboard. The art of ice sculpture is continually evolving; ice is spun on lathes & cut by routers controlled by computers. Affordable ice makers are now available that make 300lb. crystal clear blocks in your own freezer.


SYSTEMATIC STEPS 


Systematics Step Purpose: 


1. Consistency : By creating a path for your mind to follow, a more consistent 

product will emerge. 
2. Efficiency : Always using the same steps to make different carvings will create 
efficiency in motion. 
3. Confidence : You will gain confidence through repetition. 
The 7 Systematic Steps: 

 STEP DESCRIPTION 
1 Design

  • Using a template, transfer your design to the ice. 
2 Punch out 
  • Using a chainsaw cut out the silhouette. 
  • Keep all cuts at 90 degrees. 
  • Be very precise, avoid overcuts. 
  • Use a die grinder for tight turns & spaces. 
3 Blocking in 
  • Most difficult step to learn 
  • Push in reference lines with a die grinder 
  • Use a chainsaw to push back levels 
4 Rounding 
  • Cut off the corners using a combination of these 3 tools: 
 i. Chainsaw 
ii. Chisel 
iii. Die grinder with a shaping bit 
iv. Sanding 
  • Using an angle grinder or pistol grip sander, sand the areas you would like to have smooth & free of tool marks. 
6 Detailing 
  • Apply detail with a Vee bit or similar. 
  • Add textures for contrast 
7 Cleaning 
  • Clean all slush, drips, snow, & small tool marks. Refer to the chart below for which tool(s) to use. 

TOOLS IDENTIFICATION 

1 .Prong Pick 
  •  Used to split large blocks of ice for use in smaller ice boxes. 
2 .Chainsaw 
  • To cut ice into desires shape. 
  • Replacing handsaw used as it is more handy. 
3 .Hand saw 
  • To cut ice block into desires shape. 
  • Creating a corrosion surface. 
4 .Blower 
  • To clean up any drips or slush. 
5 .Pistol Grip Sander 
  • For creating a smooth surface or creating the smoothness of skin. 
6 .Chisel 
  • flat blade creates basic geometric shapes. 
7 . Tong 
  • Designed to lift 300 pound ice blocks for ice sculpting. 
8 .Vee Chisel 
  • V-shaped chisel is needed for detailed effect

PERSONAL AND SURROUNDING SAFETY 

It is extremely important carvers are aware of safety practices. Many of the rules 
and regulations are common sense, but, even so, being proactive and applying 
due diligences pay off. 
A good example is the use of hand power tools and chain saw. Read the 
operator’s manual for any of these products and it clearly stated “Do not 
expose power tools to wet or damp conditions”. That is difficult in our industry. 
But you can take precautions. 
Safety falls into THREE basic categories: 

1. Personal safety : 
a. Set up a clean, safe working station and when carving make sure 
chain saws and sharp tools are directed away from co-worker or 
spectator. 
b. Always keep electric cords in good repair. Cracked, cut, nicked 
and scuffed cords with bare wires showing are a source of electric 
shocks. 
c. Keep long hair pulled and tied back from the face and remove all 
loose jewelry. 
d. Never wear scarves or loose clothing when working with power 
tools. 
e. Don’t forget to wear safety clothing that are designed for ice 
carving purposes; steel toed rubber boots, gloves and jacket. 
2. Surrounding 
a. Be aware of co-workers. 
b. Never leave power tools, extension cords etc on the floor. Have a 
work table or a shelf close-by the work area. Double check the 
work station is free and clear of any obstructions before start to 
work. 
c. Have a proper place to hang power tools, chain saw when work is 
finished. 
d. Try and dedicate a specific space for equipment repair. 

3. Equipment 
a. Avoid petroleum-based lubricant, instead, use vegetable based 
lubricant for maintaining tools and machinery. 
b. Do not modify chainsaw by removing a section of the side guard to 
allow ice to clear the machine. 
c. Before start you work, all machines is in place and functioning 
properly. Note any failures and arrange to fix them as soon as 
possible.


Eagle
Seahorse


BUTTER SCULPTURE

History of butter sculpture

The history of carving food into sculptured objects is ancient.Archaeologists have found bread and pudding molds of animal and human shapes at sides from Babylon to Roman Britain.Butter sculpture is an ancient Tibetan Buddhist tradition;yak butter and dye are still used to create temporary symbols for the Tibetan New Year and other religious celebrations.
     During the renaissance and Baroque periods molding food was commonly done for wealthy banquets.It was during this period that the earliest known reference to a butter sculpture is found.In 1536,Bartolomeo Scappi,Cook to pope Pius V,organized a feast composed of nine scenes elaborately carved out of food,each carried in episodically as centerpieces for a banquet.Scappi mentioned several butter sculptures for the feast,including an elephant with a palanquin,a figure of Hercules struggling with a lion,and a Moor on a camel.Another early reference is found in the biography of Antonio Canova(1757-1822),who said he first come to his patron's attention when as a humble kitchen boy he sculpted an impressive butter lion for a banquet-the story is no thought apocryphal,though it reaffirms the existense of butter sculptures during the period.Butter sculpturing continued into the 18th century when English dairy maids molded butter pads into decorative shapes.
       The earlist butter sculpture in the modern sense as public art and a banquet centerpiece can be traced to the 1876 Contennial Exhibition,where caroline Shawk Brooks, a farm woman from Helena Arkansas displayed her dreaming.


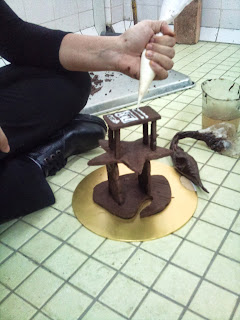
Making Chocolate Mold from Plasticine.


CAKE - MIXING, BAKING, AND DECORATE

Cake mixing and baking

Cakes are the richest and sweetest of all the baked products we have studied. 
Cakes are high in both fat and sugar. The baker’s job is to create a structure that 
supports these ingredients and yet to keep it as light and delicate as possible. 
Fortunately, producing cakes in quantity is relatively easy if the baker has good, 
well balanced formulas, scales ingredients accurately, and understands basic 
mixing method well. 
Cakes can be presented in many forms, from simple sheet cakes in cafeterias 
to elaborately decorated works of art for weddings and other important 
occasions. 


Mixing Cake 
Three (3) main goals of mixing cake batters are: 

  •  To combine all ingredients into a smooth, uniform batter. 
  •  To form and incorporate air cells in the batter. 
  • To develop the proper texture in the finished product. 
Five (5) factors can cause curdling: 

  •  Using the wrong type of fat. 
  •  Having the ingredients too cold. 
  •  Mixing the first stage of the procedure too quickly. 
  • Adding the liquids too quickly. 
  •  Adding too much liquid. 


Types Method : 

1. CREAMING METHOD PROCEDURE: 

  1.  Place butter in the mixing bowl. Using paddle attachment, beat the fat slowly until it is creamy and smooth. 
  2.  Add the sugar, cream the mixture at moderate speed until the mixture is light and fluffy. 
  3.  Add the eggs a little at a time. After each addition, beat until the eggs are absorbed before adding more. 
  4. Scrape down the sides of the bowl to ensure even mixing. 
  5. Add the sifted dry ingredients, alternating with the liquids. The reason for adding dry and liquid ingredients alternately is that the batter may not absorb all the liquid unless some of the flour is present. 

2. TWO STAGE PROCEDURE: 

  1.  Sift the flour, baking powder, soda and salt into mixing bowl and add fat. 
  2. Beat at low speed. 
  3.  Sift the remaining dry ingredients into the bowl and add part of the water or milk.
  4.  Blend at low speed. 
  5.  Combine the remaining liquids and lightly beaten eggs. 
  6.  Scrape down the bowl. 
  7. The finished batter normally quite liquid.


3. FLOUR-BATTER PROCEDURE: 


  1.  Sift flour and other dry ingredients except sugar into mixing bowl. Add fat.
  2. Blend together until smooth and light. 
  3.  Whip the sugar and eggs together until thick and light. 
  4. Add liquid flavoring ingredients, such as vanilla. 
  5.  Combine the flour-fat mixture and the sugar-egg mixture and mix until smooth. 
  6. Gradually add water or milk and mix smooth.  


Test for Doneness: 
  •  Shortened cakes shrink away slightly from sides of pan 
  •  Cake is springy. Center of top of cake springs back when pressed lightly. 
  •  A cake tester or wooden pick inserted in center of cake comes out clean. 


ASSEMBLING AND DECORATING ICING

Icing


Much of the appeal of cakes is due to their appearance. Cakes are perfect
medium which a baker can express artistry and imagination. A cake need not
be elaborate or complex to be pleasing. Certainly, a simple but neatly finished
cake is better than a gaudy, over decorated cake that is done carelessly or
without any plan for a harmonious overall design.

There are, of course, many styles of cake decorating, and within each style,
hundreds or thousands of different designs are possible. This chapter is, in part,
an introduction to some of the basic techniques for finishing cakes. The most
important requirements for making effective desserts is hours and hours of
practice with the pastry bag and paper cone. Even the simplest designs require
a lot of practice and should be mastered. Only then should you proceed to the
more advanced techniques presented in style manuals and cake decorating
books.

A cake must be assembled and iced before it can be decorated.

Also called frosting- a sweet coating for cakes and other bakes product.

Functions

Improves the keeping qualities by forming a protective coating around cakes.
Contributes flavor and richness.
Improves appearance

Types of icing:

Butter creams
Fondant
Royal icing
Fudge
Foam butter cream
Glazes
Flat type icing
. BUTTERCREAM: 
Butter, especially unsalted butter is the preferred fat for buttercreams because 
of its flavor and melt-in-the mouth quality. Icing made only with shortening can 
be unpleasant because the fat congeals and coats the inside of the mouth, 
where it does not melt. However, butter makes a less stable icing because it 
melts so easily. 
There are two ways overcome this problem: 
  •  Use buttercreams only in cool weather. 
  •  Blend a small quantity of emulsifier shortening with the butter to stabilize it. 
Types: 
i. Simple buttercream – made by creaming together fat and confectioners’ 
sugar. A small quantity of egg may be whipped in. 
ii. Meringue type buttercream – are a mixture of butter and meringue. These 
are very light icings. 
iii. French buttercream – beaten boiling syrup into beaten egg yolks and 
whipping to a light foam. Soft butter is then whip in. 
iv. Pastry cream type buttercream – made by mixing together equal part 
thick pastry cream and softened butter. To give it the necessary body, a 
little gelatin is added. 
v. Fondant type buttercream – make with only a few ingredients on hand. 
Simply cream together equal parts fondant and butter. Flavor as desired. 


FONDANT:
Is sugar syrup that is crystallized to a smooth, creamy white mass.
It is familiar for the icing of napoleons, Ă©clairs, petit fours and some cakes. When applied, it sets up into a shiny, non-sticky coating.


ROYAL ICING:
This icing also called decorating or decorator’s icing, is similar to flat icings except that it is much thicker and made with egg whites; which make it hard and brittle when dry. It is used almost exclusively for decorative work.

4. FUDGE 
  •  Rich and heavy icings. 
  •  Fudge icings are stable and hold up well on cakes and in storage.
  •  To use stored fudge icing, warm it in a double boiler until it is soft enough to spread. 
5. FOAM TYPE 
  •  Sometimes called boiled icings, are simply meringue made with boiling syrup. 
  • Should be applied thickly to cakes and left in peaks and swirls. 
  •  There icings are not stable, should be used the day prepared. 
6. GLAZE 
  •  thin, glossy, transparent coating that give a shine to baked products and helps prevent drying. 
  •  Example of simple glaze is sugar syrup that brushed onto cakes or Danish. 
  •  There are TWO types of glazes: 
  1.  Chocolate glaze – melted chocolate containing additional fats or liquids or both. 
  2.  Gelatin based glazes – which include many fruit glazes, usually applied only on tops cake. 
7. FLAT TYPE 
 Also called water icings, simply mixtures of confectioner sugar and water, 
sometimes with coffee cakes, Danish pastry and sweet rolls. 
BASIC DECORATING TECHNIQUES 

Tools 
  • Palette knife or steel spatula
  •  offset palette knife
  •  serrated knife
  •  icing screen or grates
  •  turntable 
  • icing comb
  • plastic or steel scraper
  •  brushes
  •  sugar dredger
  • cake rings or charlotte rings
  •  cake card and doilies
  •  parchment paper and 
  • pastry bag and tip. 

Paper cone 
Two factors are important if you are to be successful with both the paper cone 
and the pastry bag: 
  • a. Consistency of the icing – icing must be neither too thick nor too thin. With the paper cone or the writing tube, the icing must be thin enough to flow freely from the opening but not too thin to form a solid thread. 
  • b. Pressure on the cone or bag – pressure control is necessary for neat, exact decoration. Pressure must be kept steady and even.  
Two methods are used to make decorations: the contact method and the 
falling method. 
  1.  Falling method – cone is held above the surface, and the icing is allowed to fall or drop from the tip of the cone onto the surface being decorated. This method is used to make lines of even thickness on horizontal surfaces. The thread of icing is suspended in air between the tip of the cone and the surface being decorated. Keep the pressure light and constant. To finish a line, lower the tip of the cone and touch the surface at the point where you want the line to end. At the same time, stop squeezing the cone. 
  2.  Contact method – is used in two cases. 1. When you want to vary the thickness of the line, and 2. When you want to decorate a vertical surface, such as the side of a cake. Hold the cone as you would hold a pen, with the tip in contact with the surface and at an angle of about 30-45 degrees. Draw a line as though you were drawing on paper with a pen. Control the thickness of the line by adjusting the pressure of your thumb. 


OTHER DECORATION TECHNIQUES 
  1.  Masking the sides 
  2.  Stenciling 
  3.  Marbling 
  4.  Palette knife pattern 
  5.  Pipping jelly 
  6.  Adding fruits, nuts, and other items. 
DECORATING SEQUENCE 
  1.  Coat the side of the cake with nuts, crumbs or other coatings, either before or after decorating. If the top decorations are delicate and might be damaged if the cake is handled, mask the side first. However, if you are marbling the top of the cake or using some other techniques that disturbs the icing on the sides of the cakes, then mask the sides afterwards. 
  2. If the cake is to have an inscription or message, such as a person’s name or a holiday or birthday greeting, put this on first. 
  3.  Add borders and paper cone design. 
  4.  Add flowers, leaves, and similar decorations made with a pastry bag.
  5. . Add additional items such as fruits, nuts, or candies. 

SUGAR ARTWORK

Decorative Sugar artwork


When syrups are boiled until nearly all the water is evaporated, the sugar becomes solid when cools. This process enables us to make decorative pieces out of sugar that is boiled to 149˚c or more and shaped while still hot.
Sugar that is boiled in a syrup undergoes a chemical change called inversion; which a molecule of double sugar combines with molecules off water and changes into two molecules of simple sugar (dextrose and levulose). Invert sugar resist recrystallization, and plain sucrose, (granulated sugar) crystallize easily.
The temperature to which syrup is boiled is also important. The higher the temperature, the harder the sugar will be. The temperature ranges recommended is 155˚-160˚c, and the actual temperatures used for the pulled and blown sugar was 160˚c.
Cooking the sugar to a higher temperature makes it harder and more brittle and thus more difficult to work.  Cooking to a lower temperature makes softer sugar that is easier to work, but the pieces may not hold up as well, especially in humid climate.

Guidelines:
  •                      Use pure white granulated cane sugar.
  •                  Place the sugar and water in a clean, heavy pan. Place the mixture over low heat and stir gently until the sugar is dissolved.
  •                 When the sugar is dissolved, raise the heat to moderately high and do not stir anymore. To prevent crystallization, use a clean pastry brushed dipped in hot water to wash any sugar crystals down the side of the pan. Do not let the brush touch the syrup.
  •                        Always use a sugar thermometer.
  •            Add coloring and tartaric acid solution at the temperatures specified in the recipes.
  •          Liquid colors in an acid solution should no be used. For the best results, use powdered colors and dissolve them in a little water or alcohol. Good quality paste colors can also be used.


TOOLS FOR SUGAR WORK:
Sugar lamp, sugar thermometer, rubber gloves, blowpipe, cut off wire whip, blow torch.

1.   Spun Sugar
Spun sugar is a mass of threadlike or hair like strands of sugar used to decorate cakes and showpieces. Spun sugar should be made just before it is needed because it does not keep well. It gradually absorbs moisture from the atmosphere and becomes sticky.
Procedure:
a.     Prepare the syrup. When the correct temperature is reached, remove the pan from the heat and allow the syrup to stand for a few minutes until it is slightly cooled and thickened.
b.     Dip the cut off wire whip in the syrup and tap lightly to remove excess. Wave or flick the whip vigorously over the wooden rod so that the sugar is thrown off in fine, long threads.
c.     Repeat until the desired amount of spun sugar is hanging from the rod. Carefully lift the mass from the rod.
d.     Coil the sugar, or shape as desired for decoration.
e.     If the syrup cools too much to spin, simply rewarm it over low heat.

2.      Poured sugar
Poured sugar also called cast sugar, is boiled sugar that is allowed to harden in various shapes. Usually it is cast in flat sheets like glass, although like nougatine, it can be bent and shaped while it is hot and pliable. The syrup can also be colored before it finishes cooking.
An easy way to make a mold of any shape is to roll heat resistant plasticine into a rope and work it to the desired shaped on and oiled marbled slab or silicone ma. Whatever mold used, it should be lightly oiled to prevent the sugar from sticking.
Once the edges of the sugar shape have hardened enough, remove the mold. When the entire shape has hardened enough, slide a palette knife under it to detach it from the work surface.  To bend cast sugar, remove it from the work surface while it is still soft enough to be pliable. If it gets too hard, simply place it on an oiled baking sheet and heat it in an oven just until it is pliable. Then bend as desired, or use and oiled mold to shape it.
Procedure:
a.     Prepare the syrup as in the formula. Color the syrup as desired.
b.     When the syrup reaches the proper temperature, briefly plunge the base of the saucepan into cold water to stop the cooking. Let stand for a moment.
c.     Place a lightly oiled mold on a sheet of parchment. Pour the hot syrup into the mold to the desired thickness.
d.     Before the sugar cools, it can be marbled with another color.


3.      Pulled Sugar
Pulled sugar is a sugar that is boiled to the hard crack stage, allowed to harden slightly, then pulled or stretched until it develops a pearly sheen.
After it has been heated to the proper temperature, it must again be pulled and folded until it is cooled to a workable temperature and even in texture. Test the sugar by pulling a bit from the edge of the ball with thumb and forefinger and attempting to break it off. If it breaks off cleanly, the sugar is ready. This pulling and folding procedure is called pearling. If this is not done, it will not be possible to work the sugar properly.
Tools For Pulled Sugar:
a.     Sugar thermometer, for accurate control of the temperature of the boiling syrup.
b.     Sugar lamp or other warmer, to keep the stock of sugar warm and soft.
c.     Scissors and knife, lightly oiled, for cutting the sugar.
d.     Alcohol lamp, for melting sugar in order to fasten pieces together.
e.     Blowpipe, for blowing sugar; a pipe with a bulb for inflating is easier to use than one that is blown with the mouth.
f.        Silicone mat or oiled marble slab, for pouring out the cooked syrup.
g.     Hair dryer or fan, for cooling sugar items.
h.     Rubber gloves, to protect from burns when handling hot sugar.

Stages Of Doneness In Sugar Cooking:
STAGE
TEMPERATURE (˚c)
Thread
110
Soft ball
115
Firm ball
118
Hard ball
122-127
Small crack
130-132
Crack
135-138
*Hard crack
143-155
caramel
160-170


Pulled Sugar
Quantity
Unit
Ingredient
500
Gm
Sugar
250
Gm
Water
100
Gm
Glucose
A few drops

Strawberry essence
A few drops

Red coloring
A few drops

Banana essence
A few drops

Yellow coloring
60
Gm
Icing sugar
60
gm
Potato starch

Method:
1.      Bring sugar and water to boil to dissolve the sugar.
2.      Add glucose, bring to boil over medium high heat.
3.      Divide the syrups into 3 saucepan to color them.
4.      Allow to boil without stirring until it reach 132˚C.
5.      Remove from heat immediately and pour each color into different silicone mat.

Spun Sugar
Quantity
Unit
Ingredients
300
Gm
Sugar
150
Gm
Water
60
Gm
Glucose
A few drop

Coloring

Method:
1.      Bring sugar and water to boil to dissolve the sugar.
2.      Add glucose, bring to boil over medium high heat.
3.      Allow to boil without stirring until it reaches 132˚C.
4.      Remove from heat immediately.

Pour Sugar
Quantity
Unit
Ingredients
500
Gm
Sugar
250
Gm
Water
100
gm
Liquid glucose
A few drop

Coloring

Method:
1.      Make syrup of the sugar, water and glucose.
2.      Boil to 125˚c and add coloring if desired.
3.      Continue to boil to 165˚c. if desired, a few drops of another color could be added at this point without mixing to create a marbled effect.
4.      Stop the cooking immediately by plunging the base of the pan into cold water. Remove from the cold water and allow to stand for 2-3 minutes to thicken slightly.
5.      Pour into desired mold until approximately 5mm thick.
6.      Once edge has set enough, remove rings. Score lightly with an oiled knife.
7.      Use a little reheated sugar as glue to attached pieces together.